Let's Encrypt SSL certificate with Azure pipelines
Table of Content
1- Introduction
This will be a quick one. Who never wanted to have SSL and proper certs without spending money every year for every app ? Especially for PoC, I hate using self-signed certs and get that ugly warning when showcasing the results to stakeholders. To address this, and facilitate access to SSL for people not wallet-heavy, let’s encrypt came to life. And what a life saver it is. But then again, when testing something, I’d rely on manual certificate generation (with DNS challenge), having a proper automated solution taking time and compute I don’t specially have.
But I decided to address this problem and build a simple workflow for as cheap as I can, with the tools and skills at my disposal.
This article will provide you the means to create let’s encrypt certificates and periodically renew them for a few cents per month using:
- Azure DNS (to host your domain)
- Azure Keyvault (to securely store your certs and key)
- acme.sh to generate the certificates
- Azure pipelines to stitch together all the above and run the tasks for free
I will keep it simple and use az CLI, but you can do everything with Terraform, obviously(!).
For this project I use a subdomain for private domain. Everything below is done for service.subdomain.domain.tld. If you don’t want to use subdomain, change the scripts accordingly.
The presented solution has been designed with clustering in mind. You’ll find a pipeline variable named nodecount further down this document. This count is used to generate altnames for the certificate service.subdomain.domain.tld such as service1.subdomain.domain.tld, service2.subdomain.domain.tld.
2- The components
If you already have the required resources, go directly to 3-
2-a Azure DNS
Azure DNS is a managed service to host your DNS Zone. Very straight forward. It’s basically the same service your registrar provide you with, to setup your DNS records.
To use Azure DNS for your domain, you will need to delegate the domain management to the DNS servers provided by azure. This step is specific to your registrar, so I won’t go into detail. But if you’re here, I bet you know how to do this (otherwise your registrar should have proper documentation).
Create your Azure DNS Zone with az CLI:
# Setup a bunch of env variables
export RG=MyResourceGroup
export LOCATION=westeurope
export ZONE=toto.com

# Create an resource group if needed
az group create --name $RG --location $LOCATION

# Create the toto.com zone
az network dns zone create -g $RG -n $ZONE
The Api will return you a json with your newly created zone. The nameServers attribute gives you the list of DNS to set up with your registrar for the zone delegation:
{
  "etag": (redacted...),
  "id": (redacted...),
  "location": "global",
  "maxNumberOfRecordSets": 10000,
  "maxNumberOfRecordsPerRecordSet": null,
  "name": "toto.com",
  "nameServers": [
    "ns1-03.azure-dns.com.",
    "ns2-03.azure-dns.net.",
    "ns3-03.azure-dns.org.",
    "ns4-03.azure-dns.info."
  ],
  "numberOfRecordSets": 2,
  "registrationVirtualNetworks": null,
  "resolutionVirtualNetworks": null,
  "resourceGroup": "myresourcegroup",
  "tags": {},
  "type": "Microsoft.Network/dnszones",
  "zoneType": "Public"
}
2-b Azure Keyvault
If you’re not familiar, Keyvault is Azure’s secret management service (passwords, keys, certificates etc.). We will use it to store the generated certificates. It has a convinient versioning feature, as well as deletion protection, that makes it an ideal candidate for this use.
# Create keyvault
export KVNAME=mykeyvault$RANDOM
az keyvault create \
  --resource-group $RG \
  --name $KVNAME \
  --enable-rbac-authorization true \
  --location $LOCATION

# Create a service principal with required role to manage secrets in Keyvault
az ad sp create-for-rbac \
  --name letsencrypt \
  --role 'Key Vault Administrator' \
  --scopes $(az keyvault show -n $KVNAME |jq -r '.id')

# Assign DNS Zone contributor role to the service principal
az role assignment create \
  --role 'DNS Zone Contributor' \
  --assignee letsencrypt \
  --scope $(az network dns zone show --resource-group $RG --name $ZONE |jq -r '.id')
The output will give you the precious password (a.k.a client secret). Keep it, you will need it later to setup azure pipelines.
Creating 'Key Vault Administrator' role assignment under scope '/subscriptions/(redacted...)/resourceGroups/MyResourceGroup/providers/Microsoft.KeyVault/vaults/(redacted...)'
The output includes credentials that you must protect. Be sure that you do not include these credentials in your code or check the credentials into your source control. For more information, see https://aka.ms/azadsp-cli
{
  "appId": "(redacted...)",
  "displayName": "letsencrypt",
  "password": "(redacted...)",
  "tenant": "(redacted...)"
}
Be careful with RBAC and IAM and as possible, always try to apply the least privilege strategy. The Above examples are good for testing but may not be acceptable for production environments.
2-c Acme.sh
Acme.sh is an ACME protocol client in shell language for bash, dash and sh.
Everything you need to know is here: acme.sh.
The base usage is an http/https challenge. But you probably don’t (or don’t want to) have compute running for your ACME challenge. The script includes a manual validation using DNS verification instead long running service using letsencrypt API for http/https/dns automatic renewal. That’s the method we are going to leverage, but automated (scheduled) using azure pipeline. Thus we don’t keep compute running.
2-d Azure Devops (pipelines)
Azure Devops is a suite of managed services for application development. It includes work items, boards, wiki, but also git repositories and pipelines.
We will be using the latter. Azure pipeline allow you to run tasks and jobs automatically based on specific triggers (like PR, commits, schedules, etc.).
More about Azure Pipelines here.
If you don’t already have an Azure Devops organization, go create one for free (5 basic licenses included), and create a project.
3- Azure pipeline
3-a Azure Pipeline Definition file (yaml)
Azure Build pipelines rely on yaml definition files. Push the following file in a repository in your azure devops project, then go to next section to create the pipeline itself.
trigger:
- none

schedules:
- cron: '0 0 1 */2 *'
  displayName: Renew every two months
trigger:
- none

schedules:
- cron: '0 0 1,15 * *'
  displayName: Renew every 1st and 15th of the month
  branches:
    include:
    - main

variables:
  - group: 'static'
  - name: ARM_SUBSCRIPTION_ID
    value: '<your_sub_id>'
  - name: ARM_TENANT_ID
    value: '<your_tenant_id>'
  - name: keyvault
    value: '<your_keyvault_name>'
  - name: resourcegroup
    value: '<your_keyvault_resourcegroup_name>' #using same rg for dns zone and keyvault

pool:
  vmImage: ubuntu-latest

steps:
- task: Bash@3
  inputs:
    targetType: 'inline'
    script: |
      git clone https://github.com/acmesh-official/acme.sh.git
      export DOMAIN=$(domain)
      export SUBDOMAIN=$(subdomain)
      export RECORD=$(record)
      export NODECOUNT=$(nodecount)
      export KVCERTNAME=${RECORD//[-._]/}
      if [ $NODECOUNT>0 ]
      then
        NODE=1
        until [ $NODE -gt $NODECOUNT ]
        do
          ALTRECORDS="$ALTRECORDS -d $RECORD$NODE.$SUBDOMAIN.$DOMAIN"
          ((NODE++))
        done
      fi
      export TXT_ARRAY=($(./acme.sh/acme.sh --set-default-ca --server letsencrypt --issue -d $RECORD.$SUBDOMAIN.$DOMAIN $ALTRECORDS --dns --yes-I-know-dns-manual-mode-enough-go-ahead-please | grep -Po 'TXT value: \K.*'))

      az login --service-principal --username $(AZUREDNS_APPID) --password $(AZUREDNS_CLIENTSECRET) --tenant $ARM_TENANT_ID
      az account set -s $ARM_SUBSCRIPTION_ID
      az network dns record-set txt create -g $(resourcegroup) -z $DOMAIN -n _acme-challenge.$RECORD.$SUBDOMAIN
      az network dns record-set txt add-record -g $(resourcegroup) -z $DOMAIN -n _acme-challenge.$RECORD.$SUBDOMAIN -v ${TXT_ARRAY[0]:1:-1}

      NODE=1
      until [ $NODE -gt $NODECOUNT ]
      do
        az network dns record-set txt create -g $(resourcegroup) -z $DOMAIN -n _acme-challenge.$RECORD$NODE.$SUBDOMAIN
        az network dns record-set txt add-record -g $(resourcegroup) -z $DOMAIN -n _acme-challenge.$RECORD$NODE.$SUBDOMAIN -v ${TXT_ARRAY[$NODE]:1:-1}
        ((NODE++))
      done

      ./acme.sh/acme.sh --renew -d $RECORD.$SUBDOMAIN.$DOMAIN $ALTRECORDS --yes-I-know-dns-manual-mode-enough-go-ahead-please

      openssl pkcs12 -export -out $RECORD.$SUBDOMAIN.$DOMAIN.pfx -inkey $HOME/.acme.sh/$RECORD.$SUBDOMAIN.$DOMAIN'_ecc/'$RECORD.$SUBDOMAIN.$DOMAIN.key -in $HOME/.acme.sh/$RECORD.$SUBDOMAIN.$DOMAIN'_ecc/'fullchain.cer -passout pass:

      az keyvault certificate import --vault-name $(keyvault) -n $KVCERTNAME -f $RECORD.$SUBDOMAIN.$DOMAIN.pfx

      NODE=1
      until [ $NODE -gt $NODECOUNT ]
      do
        az network dns record-set txt delete -g $(resourcegroup) -z $DOMAIN -n _acme-challenge.$RECORD$NODE.$SUBDOMAIN --yes
        ((NODE++))
      done
      az network dns record-set txt delete -g $(resourcegroup) -z $DOMAIN -n _acme-challenge.$RECORD.$SUBDOMAIN --yes
3-b Azure Pipeline Setup
Now that your definition file is pushed in your repository, you can go to Azure Devops to finalize the pipeline.
Create a variable group
First create a variable group in the pipeline library.
In the yaml, we referenced a variable group named static, so let’s create it.
variables:
  - group: 'static'
  - name: ARM_SUBSCRIPTION_ID
    value: '<your_sub_id>'
  - name: ARM_TENANT_ID
    value: '<your_tenant_id>'
  - name: keyvault
    value: '<your_keyvault_name>'
  - name: resourcegroup
    value: '<your_keyvault_resourcegroup_name>' #using same rg for dns zone and keyvault
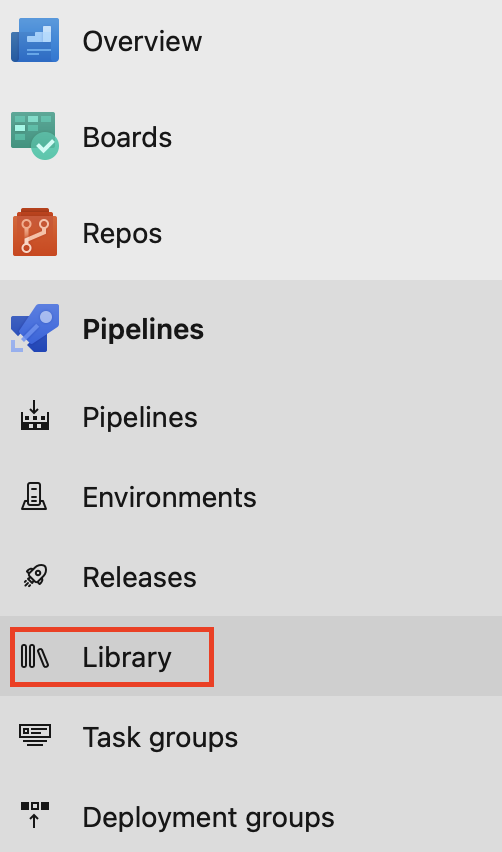
Click on Library
Click on + Variable group

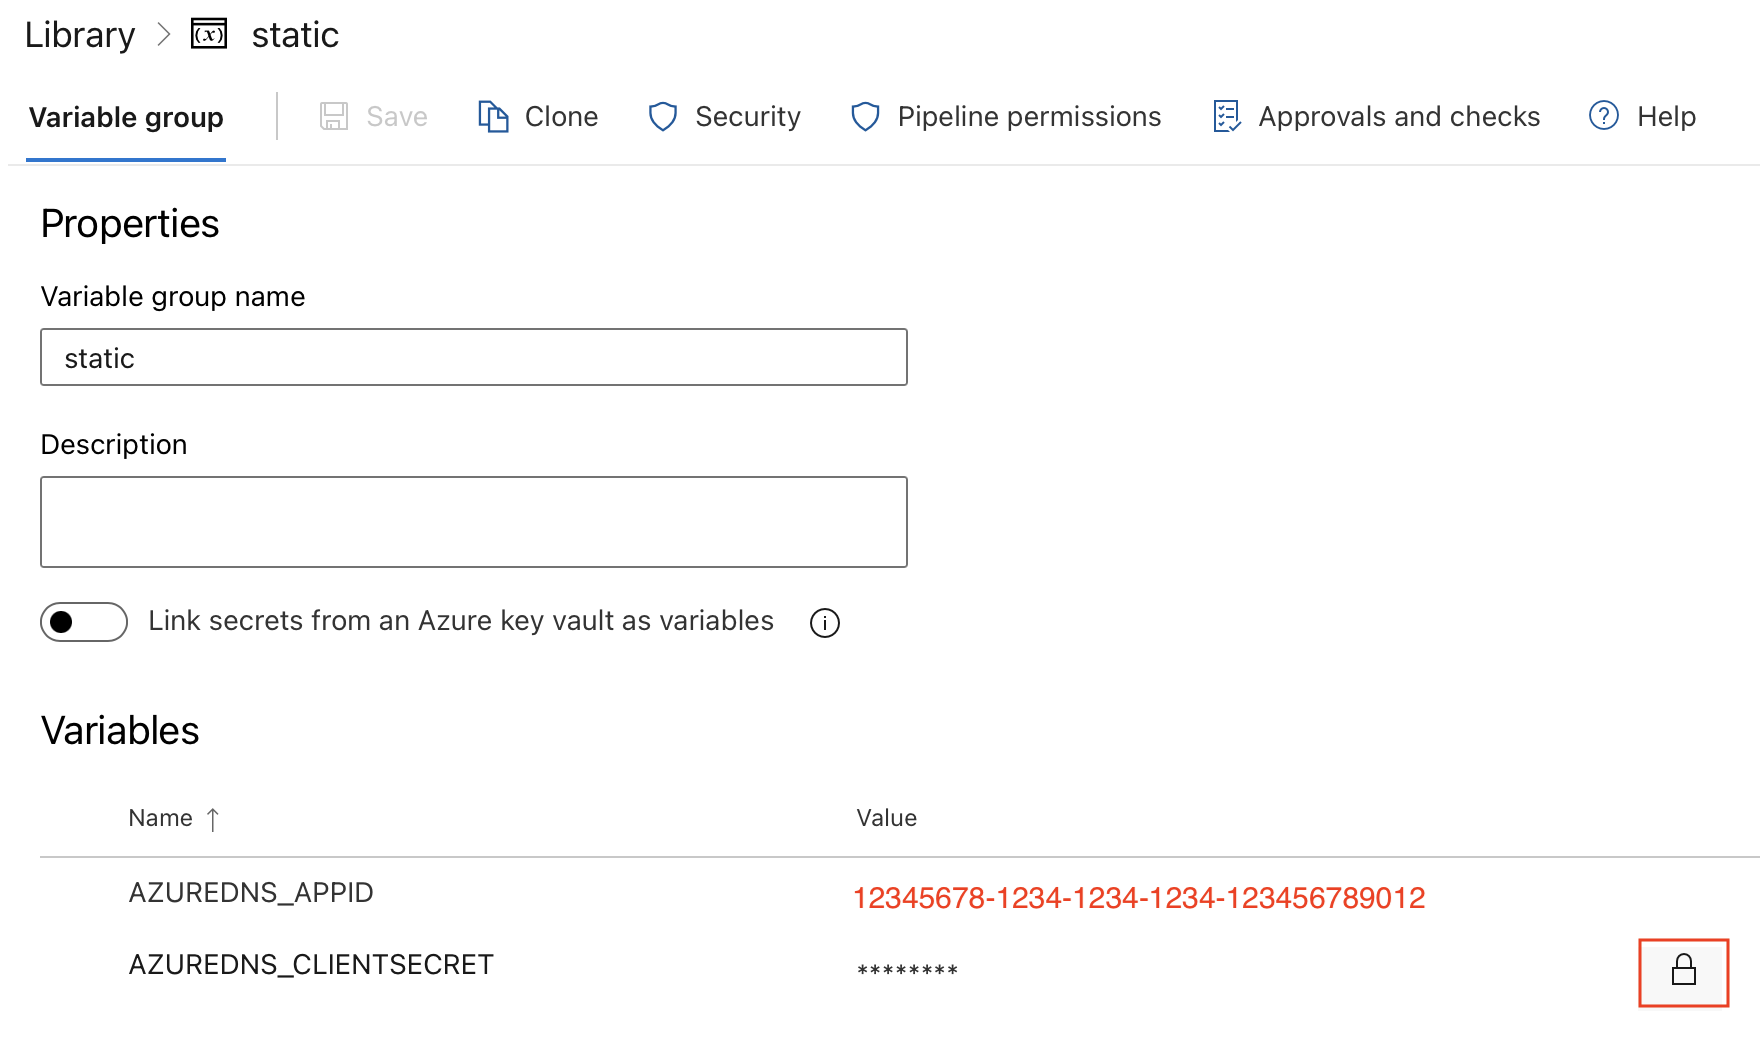
Name it static then create the following two environment variables. Now is the time to paste the password that was output when you created the service princiap in 2-. Be careful to use the same names that are defined in the shell script in the yaml file (AZUREDNS_APPIDand AZUREDNS_CLIENTSECRET).
Be sure to hit the lock button to hide the secret after creation.
Create a pipeline
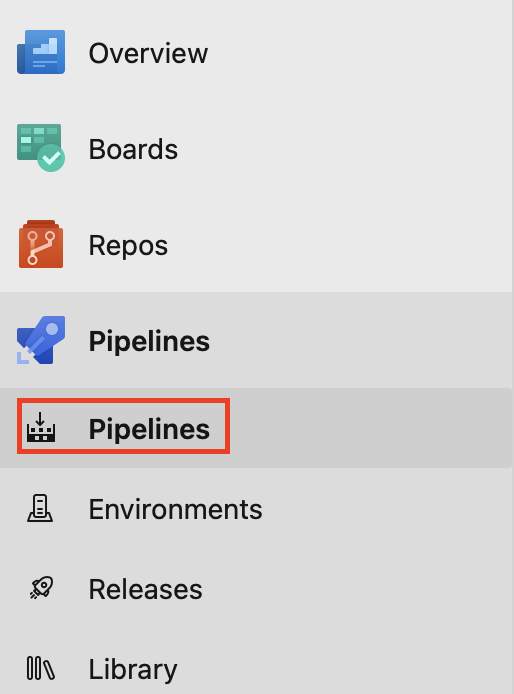
Now we can create the pipeline from the yaml file. Go to the pipeline section and select Pipelines
Then click on the New Pipeline button

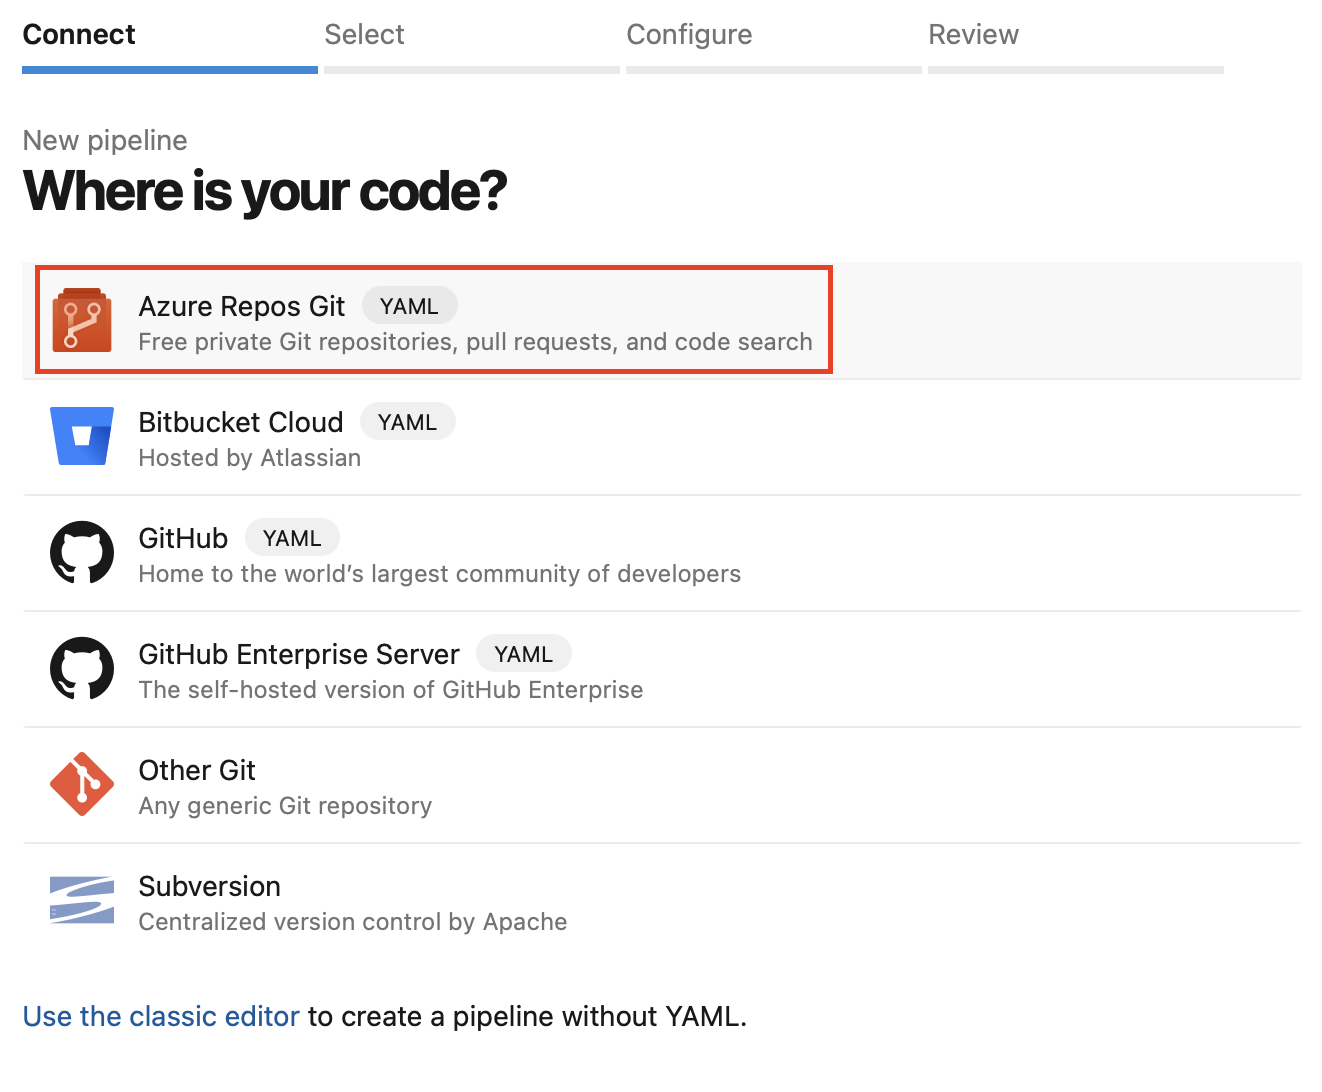
Select Azure Repos Git as source for your file
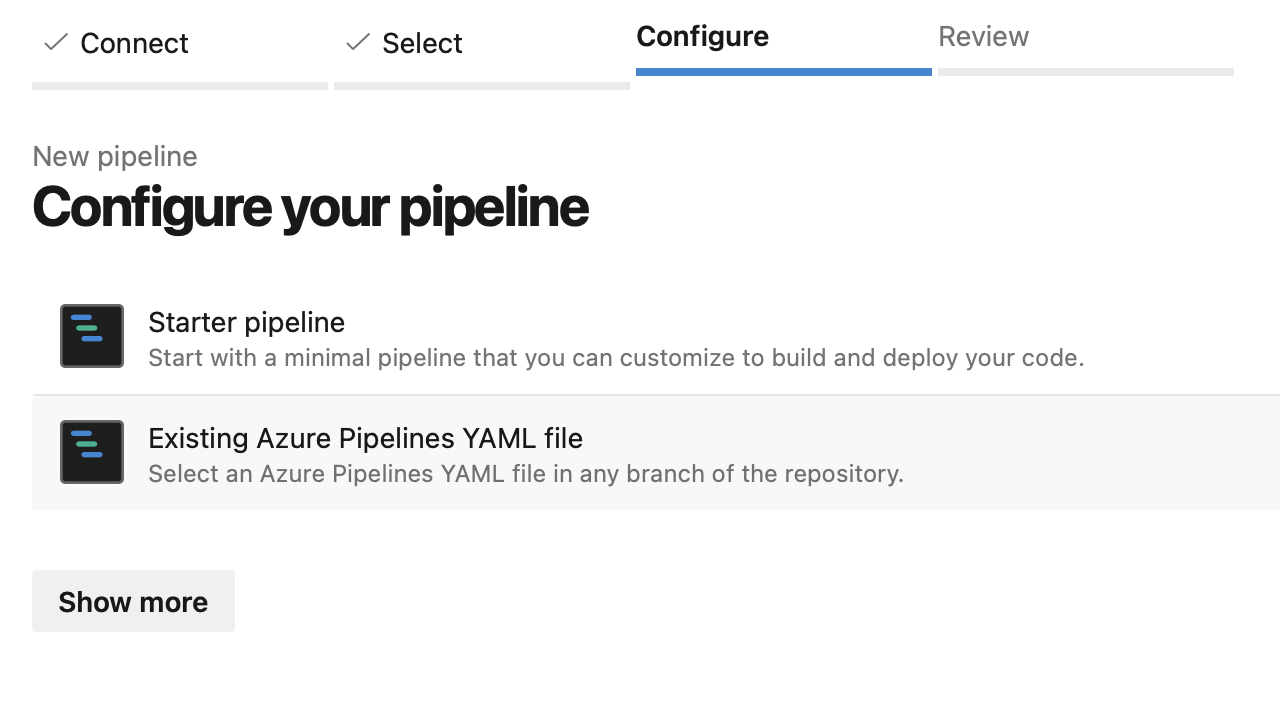
then choose Existing Azure Pipelines YAML file
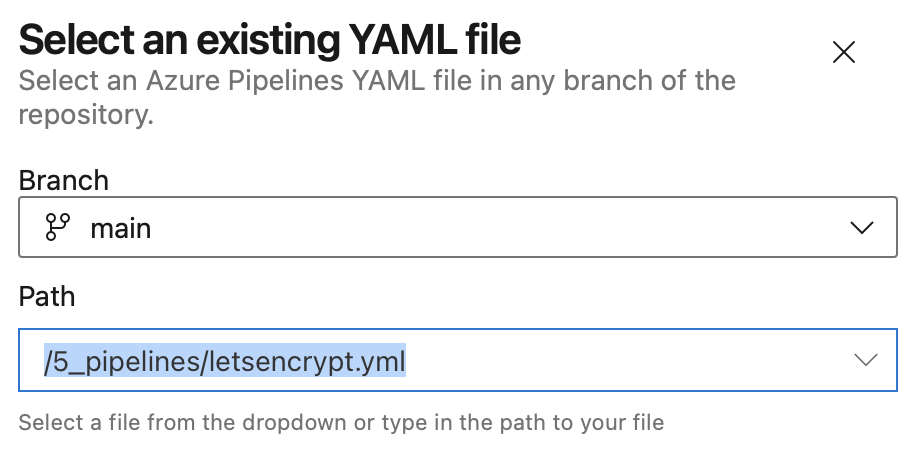
In the next window, select the yaml file to be used in the drop down menu
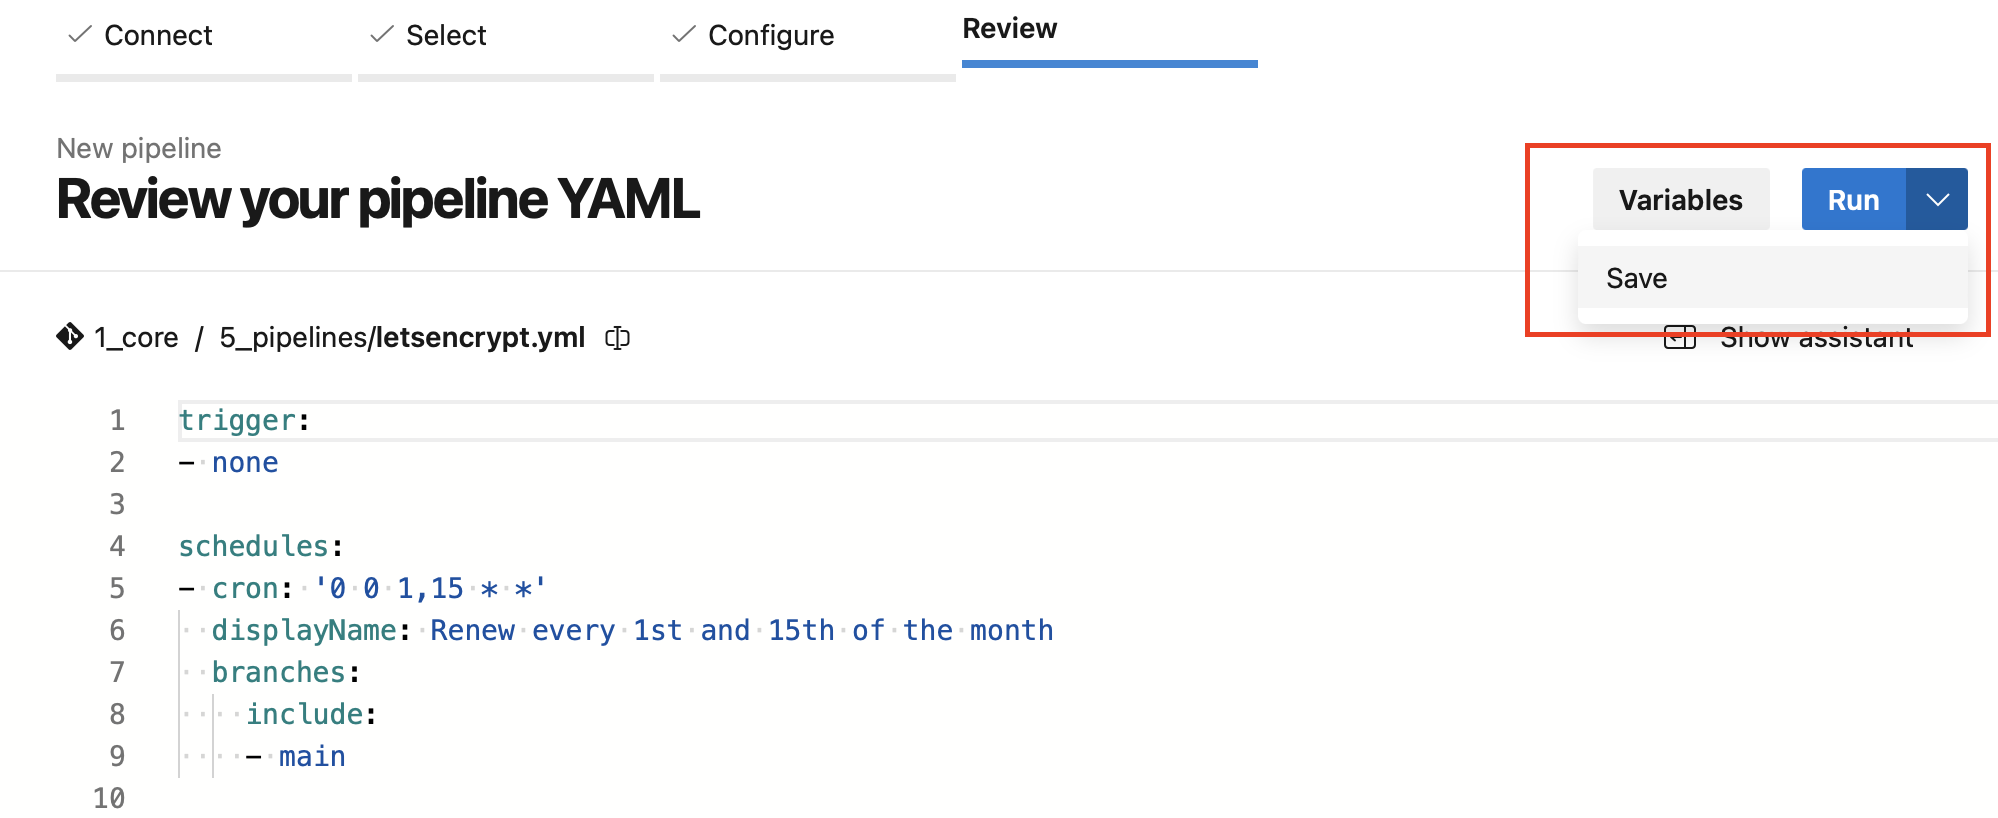
Don’t touch it yet, just select Save in the Run drop down menu.
Your pipeline has been created and with the scheduled block, it will try running automatically according to the cron strategy configured. However, it’s not ready yet.
add variables to pipeline
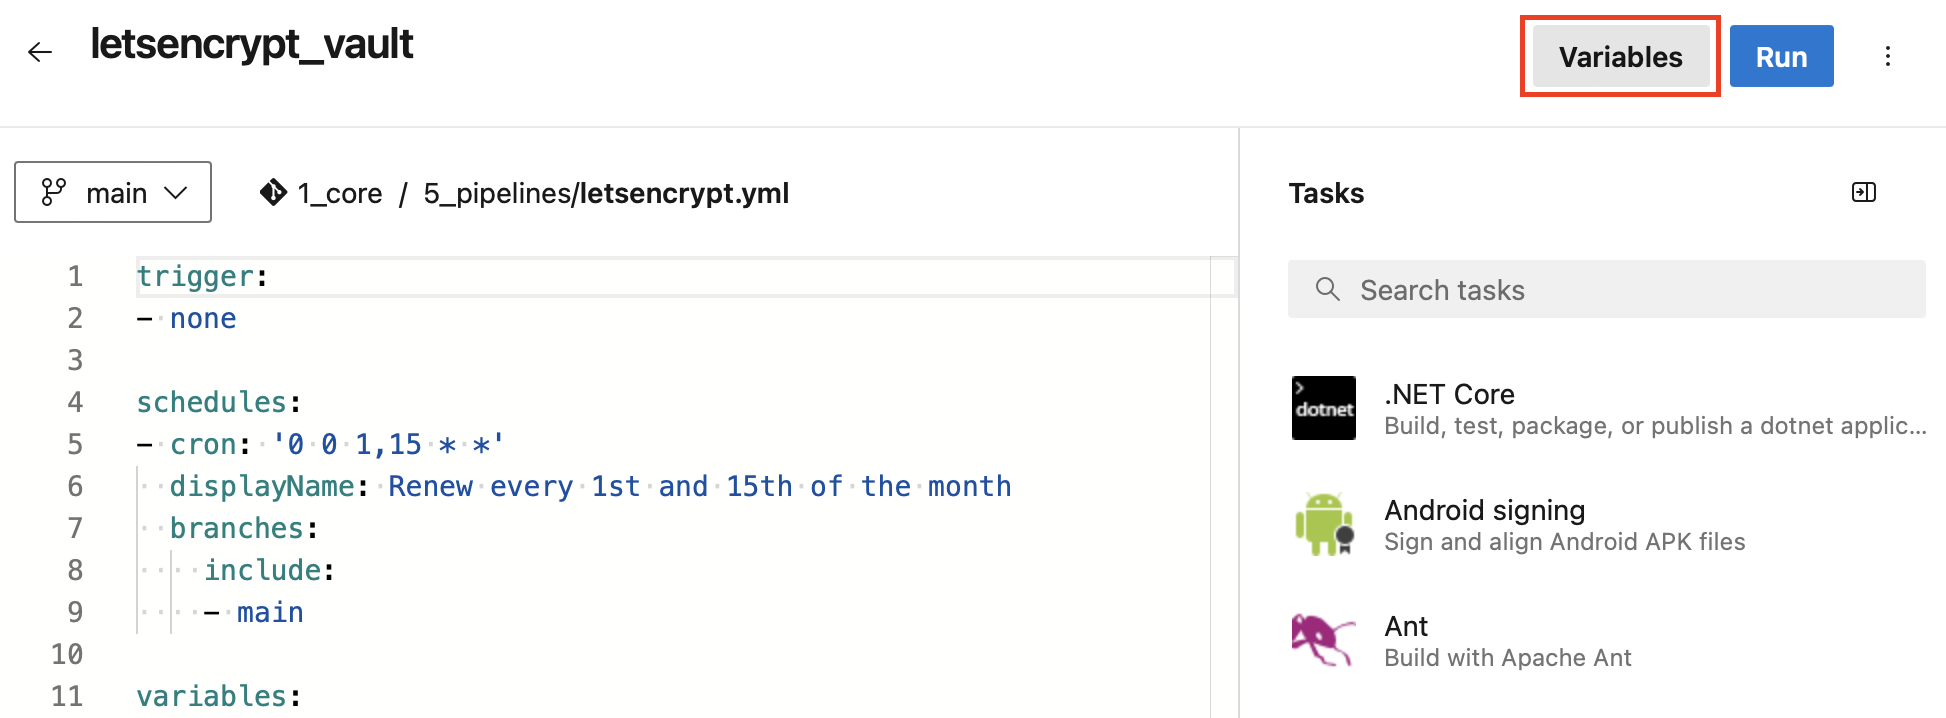
Click Edit button
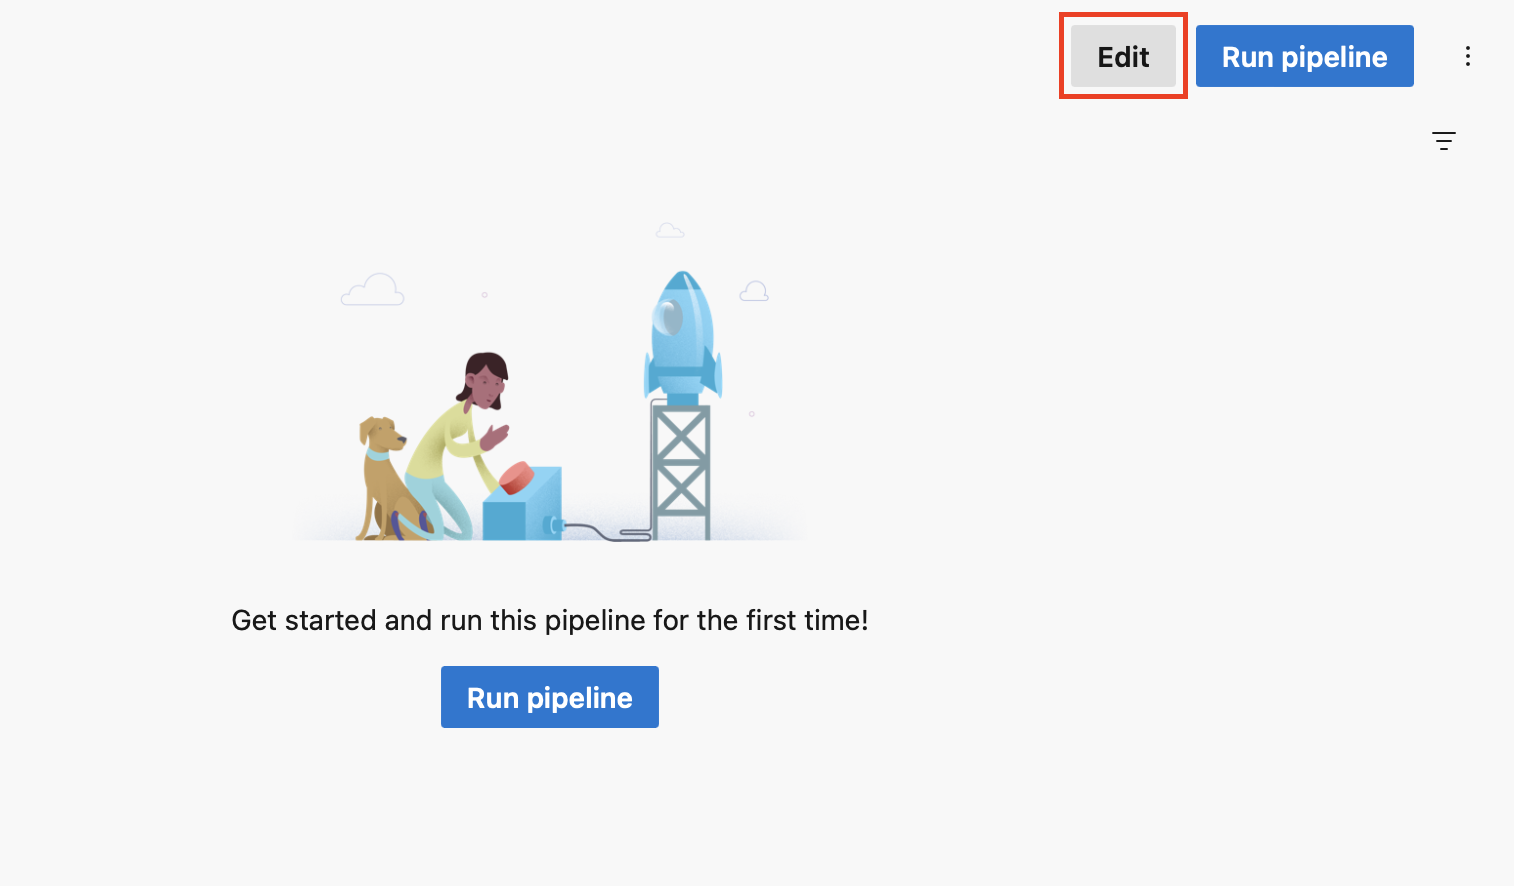
Then Variables
You surely noticed the bit below in the yaml definition file:
(Redacted...)
      export DOMAIN=$(domain)
      export SUBDOMAIN=$(subdomain)
      export RECORD=$(record)
      export NODECOUNT=$(nodecount)
(Redacted...)
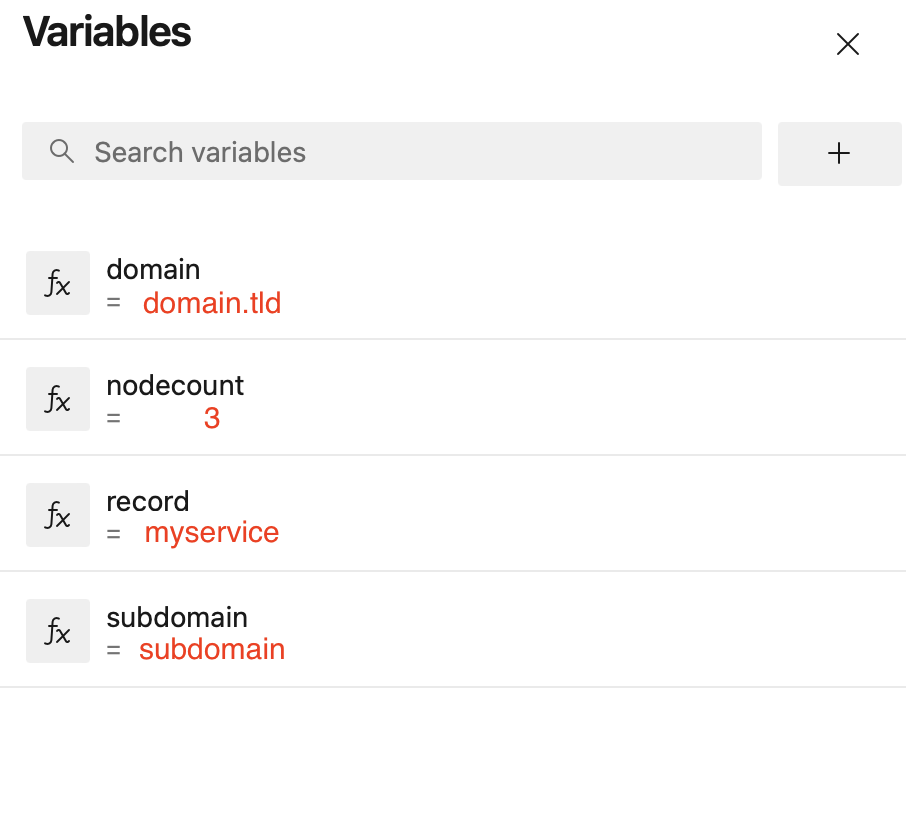
These variables need to be defined at pipeline level. That way, using the same yaml as source, you will be able to create multiple service certificates, creating a new pipeline for each new certificate.
So you need to set those variables value so the certificate can be created
4- Conclusion
That’s a wrap.
You can run manually the first time, then, the pipeline will automatically run according to the cron settings; remember letsencrypt certs lasts 90 days.
You now have a programatic renewal for your certs without the need to keep a long running workload. Azure Devops gives you 1000 minutes of free run per month, Azure DNS and Keyvault pricing are mostly request based and will costs you a few cents, maybe 1-2€, if you start using it regularly. In any case, this is far more cost effective than going through a well know CA for your SSL.
Be wary of rate limit with letsencrypt. Don’t regenerate the same cert too much or you’ll reach a threshold and be block for the next 168 hours.